Friday, June 27, 2014

May and June Apron of the Month- Free Pattern

Announcing 
May and June Apron of the Month!!
 Marie and Meg
I am so excited about these aprons I don't know where to start! These two cuties are "sister" aprons, if you look closely they are both the same pattern except for the shape (pointed or scalloped) and the finishing (ric-rac or bias tape). They are named after real sisters, my great-great Grandmother Marie and her sister Meg! It is always so interesting to see how siblings can be different, yet so alike.
Does one of the aprons looking familiar? I loved the Brown Striped Apron so much, I took the pattern from it!
I have three separate files for the patterns;
 Meg Apron skirt, Marie Apron skirt, and Pocket, Ties and Waistband.

Say Hello to Meg!
She is the bolder, more adventuresome one of the duo. A statement is shouted out with her dramatic points and eye catching ric-rac. But at heart she is still a pretty simple girl. The Meg Apron is so easy to put together! You can whip one up in about an hour. With three panels of the same piece, waistband and ties it is a piece of cake!


Don't you love this fabric? I total agreed with several comments that I needed to make an apron to match my kitchen curtains! (I thought I had posted about them, but apparently not, Opps!) I am now contemplating putting red ric-rac on the curtains! 


And say Hello to Marie!
Marie is a little bit more demur and ladylike with her scalloped hem and traditional contrasting binding. Just as easy to put together and just as easy to love! (It is a good thing I don't have to decide which is my favorite!) She is constructed just like her sister, a three panel skirt, waistband and ties.
Marie Apron was very much inspired by an apron my Great-great-Grandmother is wearing in a photo. It has been on my list for a long time to make. I love how it turned out, just like I imagined!
The fabric is an old vintage feed sack I have been saving, I don't even remember where it came from. But the minute I came across it in my stash I knew it had to be a Marie apron.

I hope you have a lovely summer weekend! We are suppose it get some sun, finally!


Tuesday, June 24, 2014

Vintage Find: Spring Form Pan

 Do you remember my post about Timeless Spring Form Pans? How I was in love with idea of a pan with interchangeable bottoms, how I wondered if they still made them? I actually did do a search online to see if I could find one. No luck.  
Then Saturday on a whim we stopped at an estate sale and there in a kitchen cabinet was a Spring Form pan with interchangeable bottoms!! 
 I must admit it took me a few minutes to realize what I was looking at. The pan with the flat bottom was on one shelve and the tube bottom was on another shelve. I almost started dancing when I figured out I had found a treasure!
 With a little scouring, it is almost like new!
 A very ingenious design. This little clip holds it all together. Just hold the ends together and slide the clip down. 
Wa-la! Now I have an angel food cake pan! I love that now I don't have to have a huge pan I only use once a year wasting space in the cupboard.
I was so excited I had to try it out! Cherry Tea Cake. Yum!

Thursday, June 19, 2014

Book Nook Chair

I couldn't decide at first whether or not to share pictures of the book nook, I still have a lot of plans for it. But then I thought, Life is all about plans and progress. It is always revolving and evolving. Blogs are suppose to be a chronicle of daily life, right? And sometimes I get a little bit tired of all those amazingly-perfect-pictures out there. That certainly isn't life! 

 So on to plans and progress. I have been so excited about putting this space together, but now that the weather is warmer the place we all gravitate towards is the front porch. So book nook has been put on hold and I have switched my focus to the porch.
 The biggest change is the chair!! Oh how I have dreamed and dreamed of this chair! It is perfect here, the right size for the space and still comfortable to cozy up with a book. It is Ikea's Tullsta Chair. Eventually, I think I will make another slipcover for it. Pale blue ticking or floral? I am working on a quilted pillow cover also, right now that is just a pillowcase.
 But how can a comfortable chair be complete with out a ottoman? I found a great tutorial on making your own and am so excited to tackle the project. I purchased a round wooden board for the base a few nights ago and am trying to determine the best height. (Hence the baskets under it.)
 To give you a bit of perspective, when seated in the chair one faces the bookshelves. They also are still in progress. One more bookcase needed to fill the spot where the tubs are. I purchased a couple of shelve baskets from Ikea for cds and dvds too. (On top of the tubs right now.) They work wonderfully! I think it is going to be a great way to keep them organized. Once we get the other shelve the baskets will also go on it.
 From this picture you can see my bedroom doorway is right there. The whole landing is about five foot by five foot. Not a lot of room, but in a small house one has to make use of it all!
 Looking from my bedroom into the book nook. The window faces East, I love the sunlight that pours through in the mornings.

Hopefully our African Violets will be happy here and bloom for us.

Thanks for taking time to see my progress! 

Do you have any projects in progress or in planning?

Tuesday, June 17, 2014

The Power of Paint

There have been so many project going on around here lately! Sewing, gardening, painting, crafting..... Since it finally feels like summer, it seems like everyone has burst in activity. I love Saturday's and tend to cram so much in that I am wore out by Sunday! This Saturday was no exception. 
The list included:
 ~ Wash and paint the wicker furniture I bought Friday.
First coat done! isn't it looking good?
~ Paint the decks chairs I recently acquired.
~ Paint the back steps to the basement.
(This has been on my list for a very long time. I tried to paint last winter, but because of the extreme cold the back stairs weren't even 50 degrees!)
So excited with how it turned out! Now we just need to paint the walls, trim and door. 
Just in case anyone needs to know this is Sherwin William's "Powder Blue". It is the same color as the porch floor and you may have noticed I am also painting the deck chairs with it.

Those are just a few project I have been working on lately, can't wait to share the details with you soon. It always amazes me what a good coat of paint can do!

Thursday, June 12, 2014

Quick Fix Alterations from Women's Day magazine-1954

 These pages I found in the 1960s Decorating book. You never know what you will find! They are from Women's Day November 1954. 
Some of the tips are helpful, but what really caught my eye was the illustrations. Too cute!

Friday, June 6, 2014

Tutorial: Making Double Fold Bias Tape


This post is for my little sister Becky (who might be a little spoiled). 
Bias tape is really only four steps. Cut. Sew. Fold and Iron. Fold and Iron again. Sounds pretty easy right? It is!
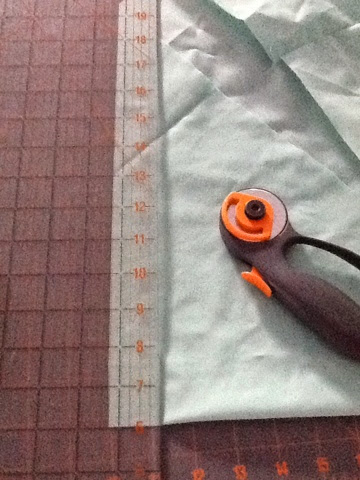
First off, you will need fabric. It really doesn't matter how much, but if it is less then a fat quarter, the seams get a little too much. You will need to start by finding the bias of the fabric. I do this by folding one corner in diangnaly and cutting on the fold. Now cut strips along the fold. If you want 1/4 binding you will need to cut an 1 1/4 strips, if 1/2 inch binding 2 1/4. This is because I it shrinks up in the making because of the stretch. 
Next sew all your strips together by matching the angled ends so they make a right angle turn. (Like sewing quilt binding together.) This ensures your seams don't stretch out of shape as they are now sewn on the straight of grain. Trim all seams even so there is nothing for the bias tape maker to get stuck on.
Iron all seams flat going one way. I usually also iron the strips to make sure it will run through the maker nicely.

Now take one end of your strips and feed it through the larger end on the maker.
I poke the fabric in as far as it will go and then use a pin to pull it through the rest of the way.
Once it is through, pull out an inch or two.
Flip the maker around so the handle is pointing down and pin the tail end to the ironing board.
Pulling slowly and straightly, pull the bias maker down the fabric with one hand, with your other hand iron down the fold. Do not pull too hard or you will stretch your bias tape out. If you do see it stretching, after you have pulled for a few inches, move the bias maker back up slightly to ease some of the tension. 
You will need to keep repositioning the pin as you work your way down your strip. Remember to keep the tension steady, but not too strong that will stretch the fabric out of shape.
You will now have a lovely length of single fold bias tape! To make it double fold, there is one more step.
Using the pin to hold your tape in place, fold in half.
Iron well to give a crisp finish.
You are done!! Now you need never stand in the fabric worrying what color of bias tape to get, the one that is a little brighter or the one that is a little more green?

(Sorry the photos aren't so good. This was kind of an experimental post using iPad photos.)